Good morning, all. I have the feeling someone needs a bit of distraction today, so I'll post a few pics of how I made my new silk flower arrangement.
First, I prepared my favorite antique crock to use as the vessel. Sometimes the vessel doesn't really match the flowers that I want to use and I have to improvise. I wanted to do more than just ram the fake flowers into the vase, so first off...
I made a clear tape grid on the crock, so it could stabilize the individual flowers.
Then I got out the flowers that I picked up at Walmart for about $16.00...
Because I already have flower arranging supplies I didn't have to purchase florist extension wires for the stems or that nifty green florist tape that sticks to itself. That stuff is awesome, by the way.
Next step was to remove the individual flowers from the bunch. Chances are you cannot use a regular pair of wire cutters, as routinely these flowers are on heavy duty wire. I use my "memory wire" cutters. This is a jewelry tool and it is easy to use on any kind of heavy wire. If you don't have this tool, you just might have to take a hacksaw to the stems. I'm telling you, this is heavy wire, like an old,
Mommy Dearest style wire hanger...
To keep the length of the stems you will want to trim the wire as close to the base as possible, but you may still need longer stems, depending on your vase, as I did.
Placing the extension stem and the end of the silk flower stem together, overlapping at least two inches, I then wrapped
(gently stretching the tape as I wrapped) the two pieces of wire together. The florist tape is designed for this purpose and is used on cut flowers, as well as the faux versions, when a longer stem is required or desired. Before placing the flowers in the vase, I slid the greenery up towards the blooms. This is usually an easy process, but sometimes leaves or flowers fall off. No Big Deal.
I started on the outside of the grid in my crock using the shorter flowers. I wanted a really full arrangement so I used all my flowers. I wrapped quite a few with the extension stems and placed them in the middle of the grid where more height was needed. Remember these flowers are on wires and can be manipulated somewhat after you place them in the vase, but it's a lot easier if you have visualized your design before hand. Of course, we are all different. Some gentle souls don't care for the same color flower next to each other, while some of you who are, hmmm, shall we say perhaps...
more Chic or Bourgeoisie may prefer to make an inverted "V" shape with their flowers. It's all up to the individual and their own unique style.
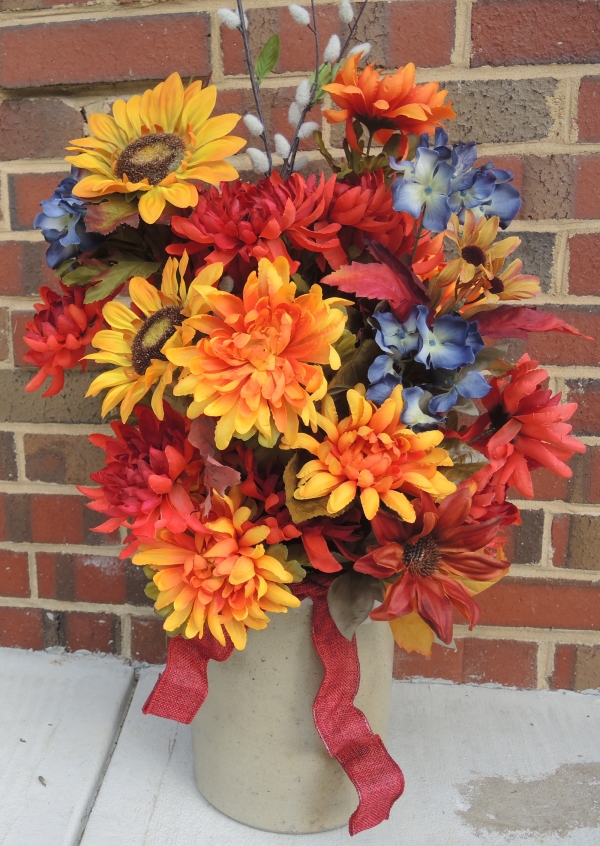
This is what I eventually decided would be best for me...
I did find some artificial pussy willows in my stash, and placed them in the back of the arrangement and also added a wired ribbon around the crock for additional interest.
I could have probably gone with a larger arrangement or placed it a table, but it still complements the wreath that I made for the wall.
This arrangement is quite rustic. I used specialty and novelty yarns to make fabric flowers to fill in the empty spaces. I also strung beads and draped them, oh, so artfully, here and there.
Well, I have made several other things lately, so maybe that will be incentive for more frequent posting. Hope you liked my little picture tutorial.
Take care, and remember to breathe.